Connect to Your Own FileMaker File
Before you begin we recommend you read the article on Backup and Demos. It is very important.
If you want to use your own solution with the LedgerLink, you have two options. The first is to use the all the scripts and logic written into the sync engine in the LedgerLink.fmp12 Starter File. The second is to do everything from scratch as laid out in the Advanced Documentation.
Before you begin, you should read the article on Matching Existing Data, if you have data in both FileMaker and in QBO that needs to line up.
Use LedgerLink.fmp12 Starter File
With this method, you will use all the sync logic that we already have built for the tables in LedgerLink. You will simply re-point table occurrences, add some qbo_ fields, and re-connect some script steps. In the Steps below we will walk through how this done with the Items table. The other tables are analogous, although transaction tables like Invoices have Line Items so it has a couple of extra steps which we'll discuss later.
All of the sync code will remain in LedgerLink.fmp12. We'll access the tables in your solution via External File References.
Organization
The code in LedgerLink.fmp12 is organized in such a way to make it relatively easy to repoint the code at another file. Here is how it is laid out.
Scripts
Each Table has a Folder of scripts that is intended for you to edit. The other scripts elsewhere in the system will not require you to edit them, but as the file is unlocked you can poke around as much as you want. Here is what that folder structure looks like:
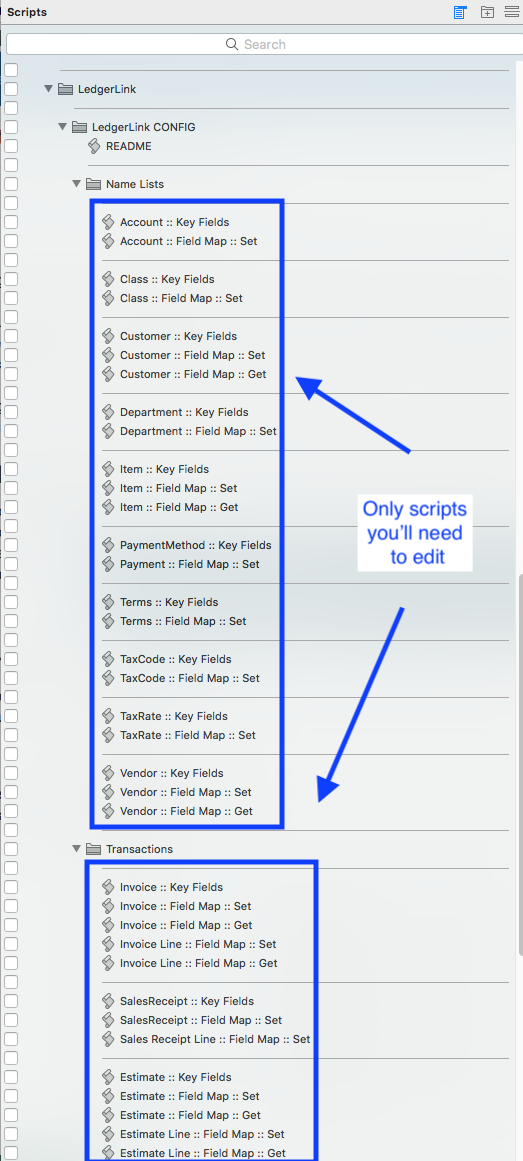
The scripts are named to correspond with the QBO API: Name Lists and Transactions. In the "Steps" section below will walk through what to do in each of these scripts.
Relationship Graph
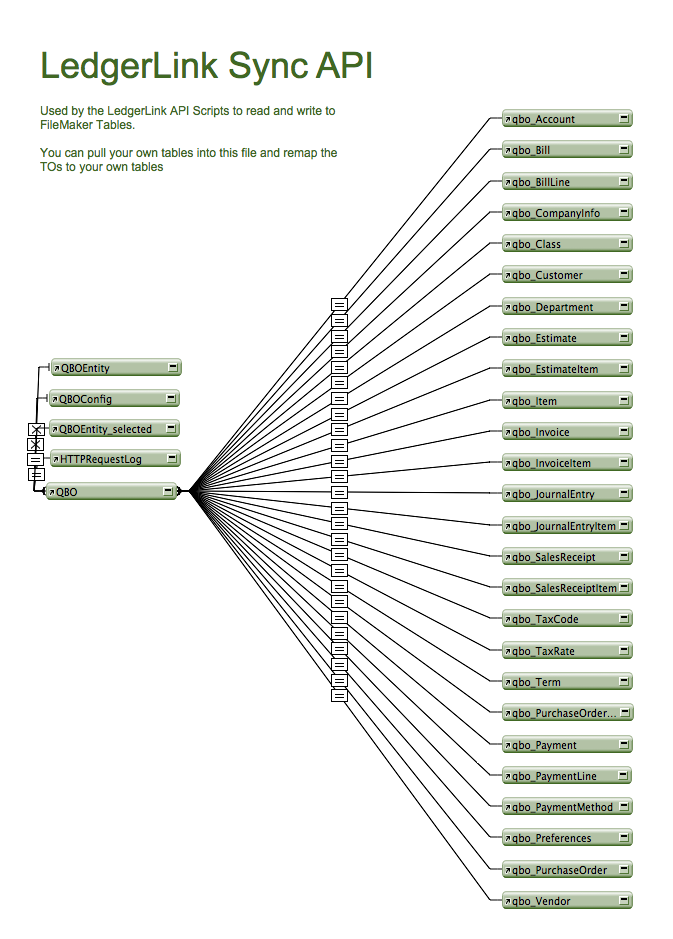
Each Table you want to connect to QuickBooks Online is represented on the graph by a Table Occurrence (TO). Out of the box those TOs are connected to the tables in the LedgerLink.fmp12 file. Your job, further detailed below in the Steps section, is to re-point them ( ie Re-connect ) them to your own tables. We'll use the Items table and FileMaker's Invoice starter solution as an example.
Here is what the pertinent section of the graph looks like:
Steps For Connecting Items
Test Connection
First make sure that you can connect to your QuickBooks Online Account. Follow the instructions on how to do that. Once you have a sync working in that scenario, you can move on to the next step.Copy the Fields
Copy qbo_id and qbo_send from the Item table in the LedgerLink.fmp12 starter solution, and past them into YOUR Items table in your solution.Repoint qbo_Item table occurrence
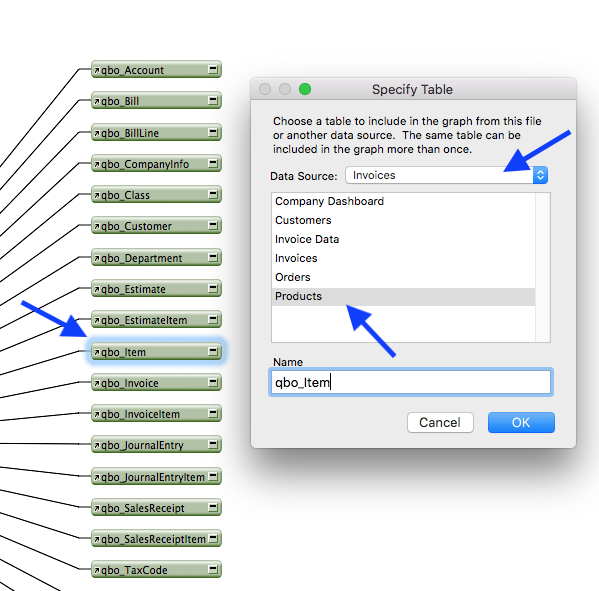
Open up the relationship Graph, and double click on the Table Occurrence qbo_Item. Add an External file Reference for your solution if it isn't there. Then chose the table that represents your Items. Close the Table Occur
rence. In the image below, we are Re-pointing the qbo_Item TO to the "Products" table of the Invoices File.
Fix Relationship
The relationship from your Item table to QBO is now almost certainly broken. Edit the relationship and make sure that the primary Key of your Items table is connected to QBOSync::id_Item. In this case the primary key has a funny name "PRODUCT ID MATCH FIELD" Here is the before
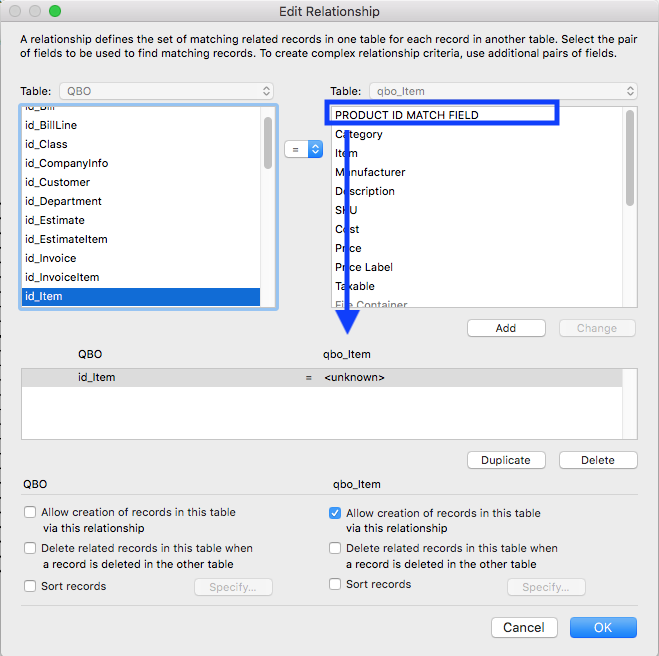 Here is the after

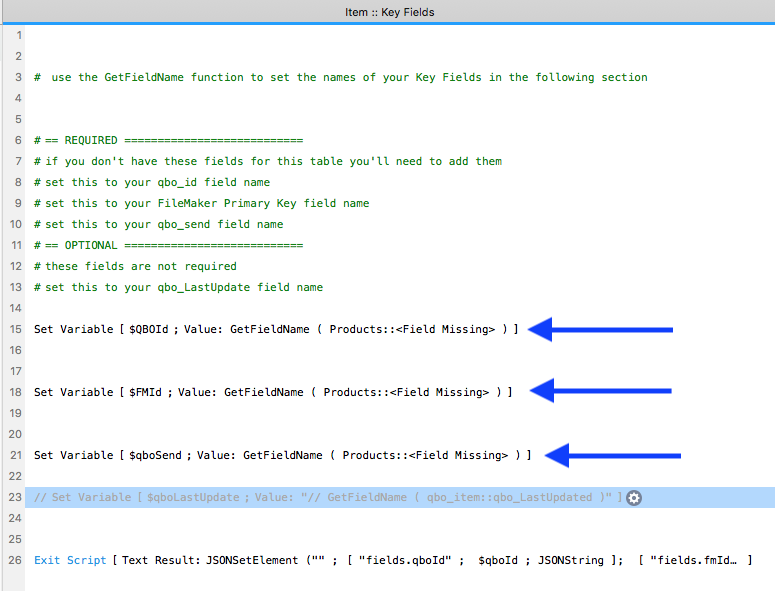
Edit the "Item :: Key Fields" Script
Open the "Items :: Key Fields" script. There will likely be \<Field Missing>s, or mismatches. Follow the instructions in that script to make sure to connect the right fields. Note we renamed the qbo_Item TO to Products to make the point that it is different. Renaming is optional.Here is the before
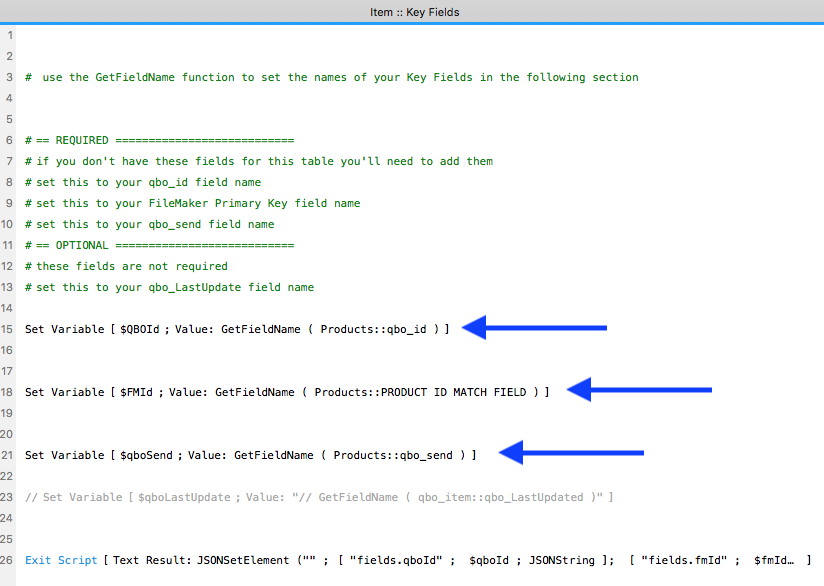
Here is the after
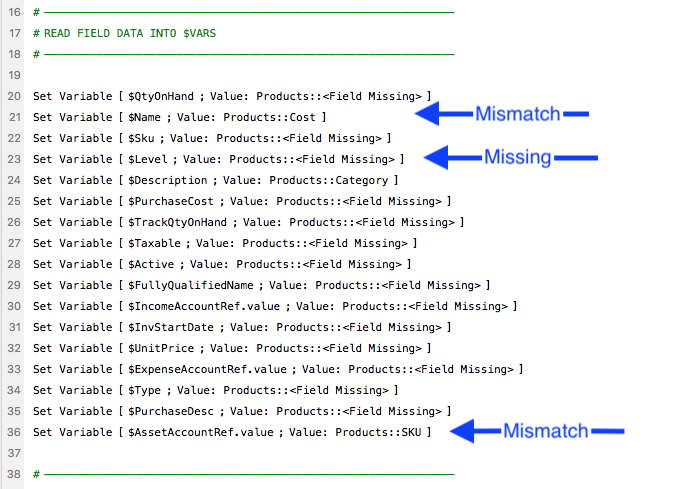
Edit the "**Item :: Field Map :: Get**" Script
This script handles reading the data from tables into variables so the sync engine can send it up to QBO. When you open the script you'll see \<Field Missing>'s and possibly some mismatches in the "READ FIELD DATA INTO $VARS" Section. Your job is to correct those mismatches and \<Field Missing>'s by connecting them to the correct fields from your table.
Before ( note: only showing part of the script )
 After
After
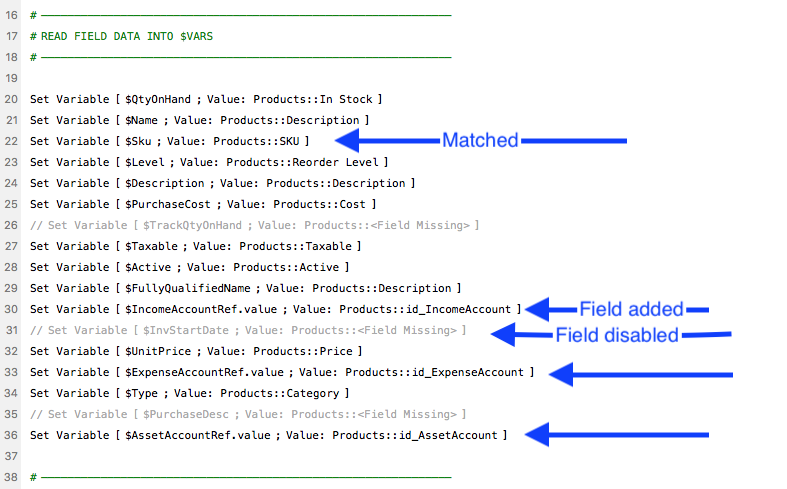 NOTE: If you don't have a field in your system and don't think you'll need it, just disable the step. Also disable the step in the corresponding step below. Look down the script you'll see the same variable name used.
Edit the "Item :: Field Map :: Set" Script
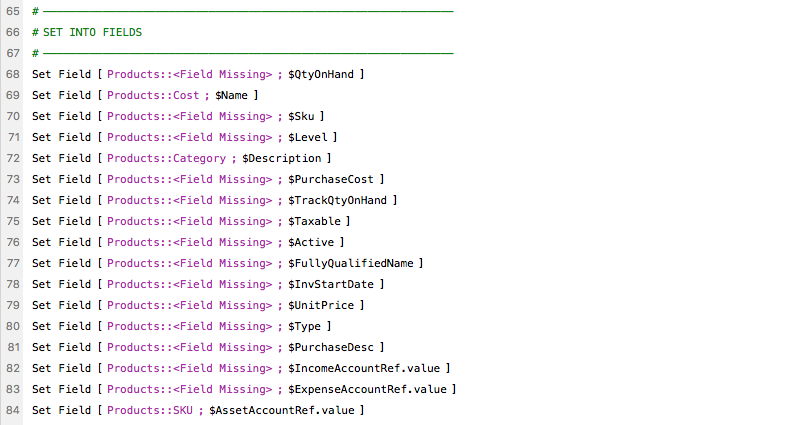
In this step you'll do something very similar to the step above. When you open the script, you'll see mismatches and \<Field Missing>'s in the bottom part of the script, in the SET INTO FIELDS section. Your job is to correct them, just like you did above.Before ( note: Not showing all the steps for brevity. Keep going )
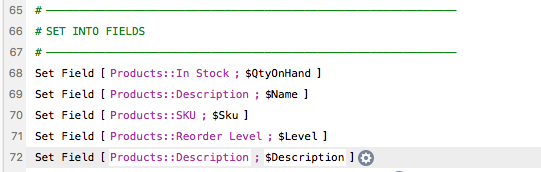
 After
After
Repeat For Invoices and Customer, etc.
You'll do the same thing for any other table that needs to remap to your solution, such as Customers and Invoices. Note that Invoices, and all transaction tables, have two extra Scripts for handling the Line Items. You'll need to do those as well.